A Beginner's Guide to Guitar Pedals
by Dave Fox
The global guitar effects pedal market is worth over $1.8 billion, yet surveys consistently show that more than half of all beginners buy the wrong pedal first — and most of those pedals end up collecting dust within six months. If you're starting your journey with guitar pedals for beginners, the good news is that you don't need a massive board or a big budget to get great sounds. You need the right foundation. This guide covers what pedals actually do, which ones belong on your board, and how to avoid the mistakes that waste your money and muddy your tone. For more gear breakdowns, head over to our music gear section.
Guitar pedals — also called effects pedals or stompboxes — are small electronic devices that sit between your guitar and your amplifier. You step on a footswitch to activate or bypass them, and they shape your signal in specific ways: adding grit, sweetening sustain, adding depth, or creating entirely alien sounds. Every iconic guitar tone you've heard on a record almost certainly involved at least one pedal.
According to Wikipedia's overview of effects units, the roots of guitar effects stretch back to the 1940s — but the modern pedalboard as we know it is a surprisingly recent invention. Players like Jimi Hendrix, David Gilmour, and Eddie Van Halen helped turn the stompbox into an essential instrument in its own right. Today the options can feel endless, but the principles behind them are simple once you know what to look for.
Contents
Guitar Pedal Myths That Cost Beginners Real Money
Before you spend a single dollar, you need to know what the guitar pedal world gets wrong about beginners. These myths are everywhere — in forums, in music stores, and on YouTube. They push new players toward bad purchases and bad habits.
More Pedals Doesn't Mean Better Tone
Walk into any guitar forum and you'll find players with 20-pedal boards talking about their "minimal rig." Here's the truth: more pedals almost always means more problems. Every pedal in your chain is another potential source of noise, another cable connection that can fail, and another thing to manage while you're trying to play. The most memorable guitar tones in history — think AC/DC's rhythm crunch or Kurt Cobain's raw distortion — came from simple rigs with two or three pedals at most.
Players obsess over gear because it's easier than practicing. Don't fall into that trap. Start with three pedals maximum. Get good with those. Then add more only when you can clearly hear what's missing from your sound.

Price Doesn't Guarantee Quality
A $400 boutique overdrive is not automatically better than a $60 Boss pedal. Boutique pricing often reflects hand-wiring labor costs, small production runs, and brand prestige — not necessarily superior tone. Some of the most-used distortion pedals on professional tour rigs cost less than $100. The ProCo RAT, for example, has appeared on landmark albums across multiple decades despite being one of the most affordable dirt pedals ever made. For proof, check out albums that were built around the ProCo RAT distortion pedal — the list will surprise you.
Pro tip: Buy used pedals from reputable sellers. Guitar pedals are famously durable — a ten-year-old Boss pedal bought secondhand for $30 will sound identical to a brand-new one.
The Essential Guitar Pedals for Beginners: What You Actually Need
You don't need every pedal type — you need to understand what each one does so you can choose intelligently. Here's a breakdown of the main categories and what they bring to your tone.
Core Pedal Types Explained
| Pedal Type | What It Does | Best For | Beginner Pick |
|---|---|---|---|
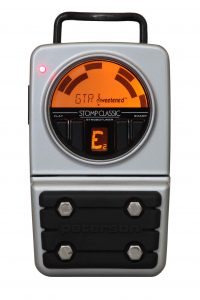
| Tuner | Keeps your guitar in pitch | Every player, every genre | Peterson Stomp Classic |
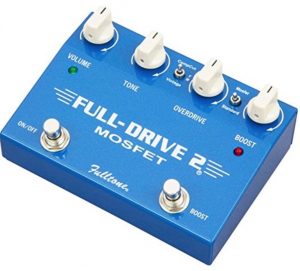
| Overdrive | Adds warm, musical grit | Blues, rock, country | Fulltone Fulldrive 2 |
| Distortion | Heavy clipping for aggressive tone | Hard rock, metal, punk | Boss DS-2 |
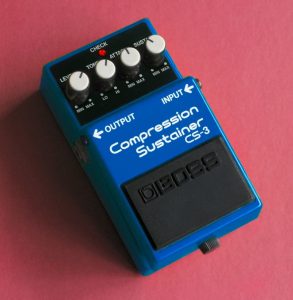
| Compression | Evens out your dynamics, adds sustain | Clean tones, country, funk | Boss CS-3 |
| Reverb | Simulates natural room ambience | Every genre | Electro-Harmonix Holy Grail |
| Delay | Repeats your signal at set intervals | Rock, ambient, country leads | MXR Carbon Copy |
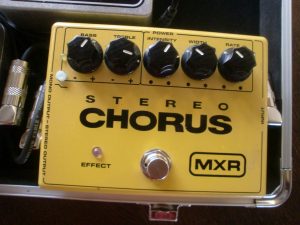
| Chorus | Thickens tone with subtle pitch modulation | Clean tones, 80s sounds | MXR M134 Stereo Chorus |
| Noise Gate | Cuts unwanted hum between notes | High-gain players | Boss NS-2 |
Your starting lineup should be: a tuner pedal (non-negotiable), one dirt pedal (either overdrive or distortion — pick based on your genre), and one ambient pedal (reverb or delay). That's a complete rig for 90% of playing situations.
Power Supplies, Cables, and Boards
This is where many beginners cut corners — and pay for it in noise and headaches. Here's what you need to know:
- Power supply: Use a dedicated isolated power supply (like a Voodoo Lab Pedal Power or a Truetone 1 Spot Pro). Running everything off a single daisy-chain adapter introduces noise and can damage sensitive pedals over time.
- Patch cables: Short, right-angle patch cables reduce clutter and signal loss. Brands like Mogami and Evidence Audio are reliable without being expensive.
- Pedalboard: A simple Pedaltrain board or even a plywood DIY board with hook-and-loop fastener (Velcro) works fine for beginners. You don't need a $300 flight case yet.
- Input/output cables: Use good-quality instrument cables (6 inches to 10 feet) from your guitar to the board and from the board to your amp. Cheap cables cause more tone problems than almost any other variable.

When to Use Pedals — and When to Leave Them Off
Pedals are tools. Like any tool, the right timing matters more than owning the fanciest version. Knowing when to reach for a pedal — and when to pull your foot back — separates players who sound good from players who just have a lot of gear.
The Right Time to Start Adding Effects
Add a pedal to your rig when you can clearly hear what you need and know that pedal delivers it. Specifically, you're ready to start using guitar pedals for beginners when:
- You can play chord progressions and simple melodies cleanly and consistently
- You've dialed in your amp's clean and overdrive channels and know what you like
- You have a specific sonic goal in mind — not just "cooler sound"
- You understand basic signal flow (guitar → amp) before adding devices in between
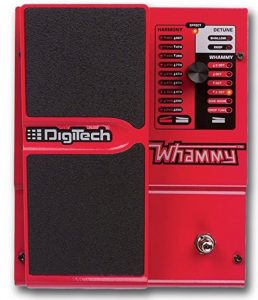
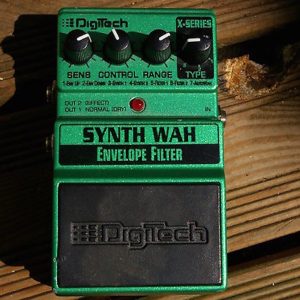
Specialty pedals like pitch shifters (devices that shift your note up or down in intervals) and envelope filters (which create that funky "wah" sound automatically based on your playing dynamics) make the most sense once you're already comfortable with your core tone.
When Pedals Work Against You
There are situations where the pedal is the wrong answer entirely. Leave the pedals off when:
- You're working on technique — playing through heavy distortion masks sloppy fretting and picking, and you'll develop bad habits faster
- You're learning a new song — hear it clean first, then layer effects once you know the part
- You're in a band rehearsal trying to find your place in the mix — too many effects clutter the frequency space that other instruments need
- Your amp sounds bad — no pedal fixes a fundamentally poor-sounding amplifier; fix the source first
Warning: Heavy distortion and reverb together are the most common way beginners hide bad technique from themselves — and delay fixing it for months.
How to Build and Connect Your First Pedalboard
Signal chain order is one of the most misunderstood topics in the guitar pedal world. The order your pedals sit in physically determines how they interact with each other — and the wrong order can completely destroy your tone.
Signal Chain Order, Explained Simply
Think of signal chain as a recipe. The ingredients are the same, but if you add them in the wrong order, the result changes. Here's the standard beginner signal chain order, from guitar to amp:
- Tuner — always first, so it sees the cleanest signal and mutes the output when you tune
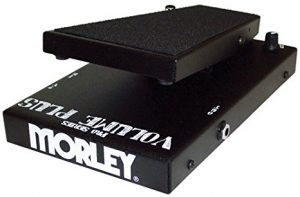
- Volume pedal — early in chain controls overall volume going into your effects
- Compression — evens out dynamics before hitting distortion
- Wah / filter — before dirt pedals for the classic sweep sound
- Overdrive / Distortion / Fuzz — the core dirt pedals
- EQ — sculpts the tone after your dirt pedals
- Chorus / Modulation — comes after dirt, before time-based effects
- Delay — near the end so the echoes don't get distorted
- Reverb — always last, creates the sense of space around everything else
You won't have all nine categories as a beginner — but when you add new pedals, you already know where they belong.
Connecting Everything Step by Step
Here's exactly how to wire up your first pedalboard from scratch:
- Lay your pedals out on the board in signal chain order, left to right or bottom to top — whatever fits your layout
- Measure and cut patch cables (or use pre-cut cables) to connect the output of each pedal to the input of the next
- Connect your power supply outputs to each pedal — verify the voltage (most pedals use 9V DC) and polarity (center-negative is standard) before you plug in
- Run your guitar cable into the input of the first pedal (the tuner)
- Run a cable from the output of your last pedal into your amp's input
- Power everything on, then strum — you should hear your clean guitar signal
- Step on each pedal one at a time to verify it activates and bypasses cleanly
If you want to study how professional players organize complex boards for inspiration, Joe Satriani's rig rundown is a detailed look at how a touring guitarist's chain evolves over a career. Don't copy it — but use it to understand the logic.
Fixing the Most Common Guitar Pedal Problems
Every guitarist hits the same wall: you plug in your new rig and something sounds wrong. Knowing how to diagnose these issues quickly turns a frustrating experience into a five-minute fix.
Hum, Hiss, and Unwanted Noise
This is the most common complaint with beginner pedalboards. Here's what causes it and how to fix it:
- Ground loop hum (a steady 60Hz buzz): caused by multiple power sources creating a loop. Fix: use a single isolated power supply, or plug everything into the same power strip
- Single-coil hum (60Hz hum from your pickups): this is normal — single-coil pickups are inherently noisy. A noise gate pedal (which silences the signal when you stop playing) helps manage this
- Radio frequency interference (random crackle or voices): caused by nearby electronics. Move away from computers, LED lights, and fluorescent bulbs
- Cable hiss: cheap cables or long cable runs add noise. Replace them one at a time until the hiss disappears
Tone Loss and Volume Drops
Tone suck is the phenomenon where your guitar sounds thin, dull, or quieter when routed through your pedalboard compared to plugging straight into the amp. Here's how to diagnose and fix it:
- True bypass vs. buffered bypass: True bypass pedals (which route the signal around the circuit when off) can cause tone loss when you chain many of them together. A single buffered bypass pedal (which keeps the signal active and strong) early in your chain fixes this
- Cheap patch cables: Replace them. This is the single most common undiagnosed cause of tone loss
- Volume drop from overdrive: Your output level knob is too low. Raise it until your bypassed volume matches your effected volume
- Daisy-chain power sag: Some pedals pull down voltage when sharing a single power adapter. Switch to isolated outputs on a quality supply
Diagnosing tone issues is a process of elimination. Bypass every pedal and test straight into the amp. Then add pedals back one at a time until the problem reappears — you've found your culprit.
If you're building a metal-focused rig and researching which distortion pedals hold up at high gain, our breakdown of the best distortion pedals for metal covers the specific options that handle extreme amounts of gain without collapsing into mud.
Frequently Asked Questions
What is the first pedal a beginner should buy?
A tuner pedal is the first pedal every guitarist should own, regardless of skill level or genre. It keeps you in tune, mutes your signal silently while you adjust, and costs less than $60 for a quality option. Once you have a tuner, your second pedal should be a single dirt pedal — overdrive for warm crunch, distortion for heavier tones — chosen based on the music you actually want to play.
Do guitar pedals work with any amplifier?
Most guitar pedals work with any guitar amplifier that has a standard instrument input. Some pedals — particularly high-gain distortions — respond differently depending on whether your amp is solid-state or tube-based. Tube amps interact with overdrive and distortion pedals in a more dynamic, touch-sensitive way. Solid-state amps produce a more consistent response. Neither is wrong — they just sound different, and you should test your pedals through your specific amp before assuming something is broken.
How many pedals do I need to start?
Three pedals are enough for a complete beginner rig: a tuner, one dirt pedal (overdrive or distortion), and one ambient pedal (reverb or delay). That combination covers the majority of tones used in rock, blues, country, and indie music. Resist the urge to buy more until you've spent real time with those three and can clearly hear what's missing from your sound.
Next Steps
- Plug your guitar directly into your amp and spend 15 minutes dialing in the best clean tone you can get from the amp alone — this gives you a reference point before any pedals enter the chain.
- Choose your first three pedals based on the table in this guide: a tuner, one dirt pedal that matches your genre, and one reverb or delay pedal. Buy used if possible.
- Wire up your board following the signal chain order in the step-by-step section, then test each pedal individually before activating multiple at once.
- If you encounter hum or tone loss, use the troubleshooting section to work through the problem systematically — replace cables first, then address power, then individual pedals.
- Once you're comfortable with your three-pedal rig, explore the music gear section to research your next addition — but only add something when you can hear a specific gap in your current sound.


About Dave Fox
Dave Fox (also known as Young Coconut) is a musician, songwriter, and music historian who has been making and studying music across genres for over twenty years. His work spans experimental, jazz, krautrock, drum and bass, and no wave — a breadth of listening that informs his writing about musical history, gear, and the artists who push sound in unexpected directions. At YouTubeMusicSucks, he covers music history and genre guides, musician interviews, and music production resources for listeners and players who want more than the mainstream offers.
Check for FREE Gifts. Or latest free acoustic guitars from our shop.
Remove Ad block to reveal all the rewards. Once done, hit a button below