How to Make Vaporwave Music Videos Using Adobe Premiere Pro
by Jay Sandwich
Are you looking to invoke nostalgia for the pop-culture of the past? Need a music video to match your new vaporwave tune?
Maybe you just want an introduction into aesthetic design. Look no further. Today we take you through the whole process of how you can make your own vaporwave video using Adobe Premiere Pro. Check it out!
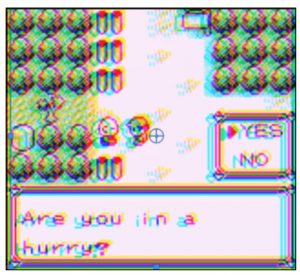
Oh BTW, here's what our music video will look like, more or less, once we're done:
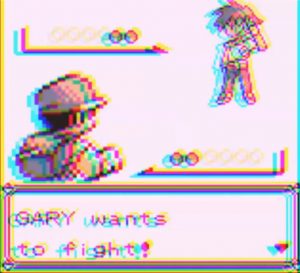
Explanation:
We're going to take gameplay footage of an old 8-bit game (although feel free to apply this to your favourite Simpsons episode) and split it into its red, green, and blue channels, like so…
We will offset those colour channels and then apply a VHS-tape warping effect to make it look like you recorded the footage 30 years ago.
Step 1: Obtaining Footage
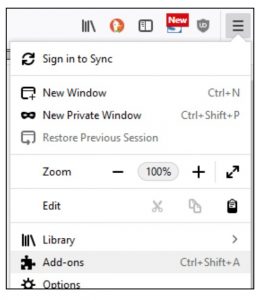
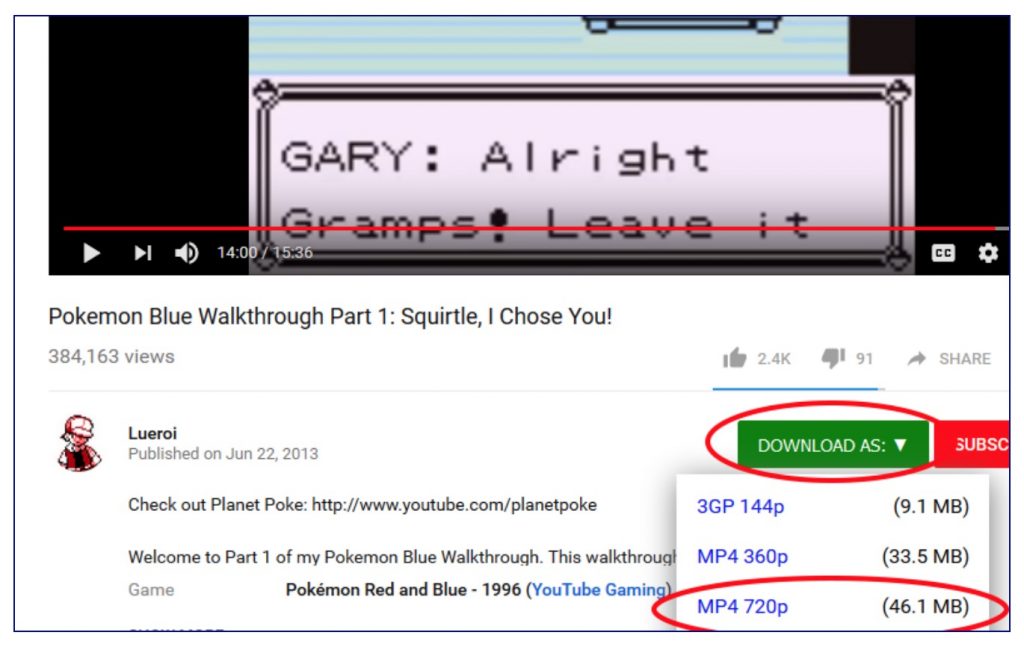
Install a Youtube video downloader add-on onto your Firefox or Chrome browser.

Then, download gameplay footage of an old 8-bit game.
Download this VHS overlay while you're at it:
Step 2: Splitting The Layers
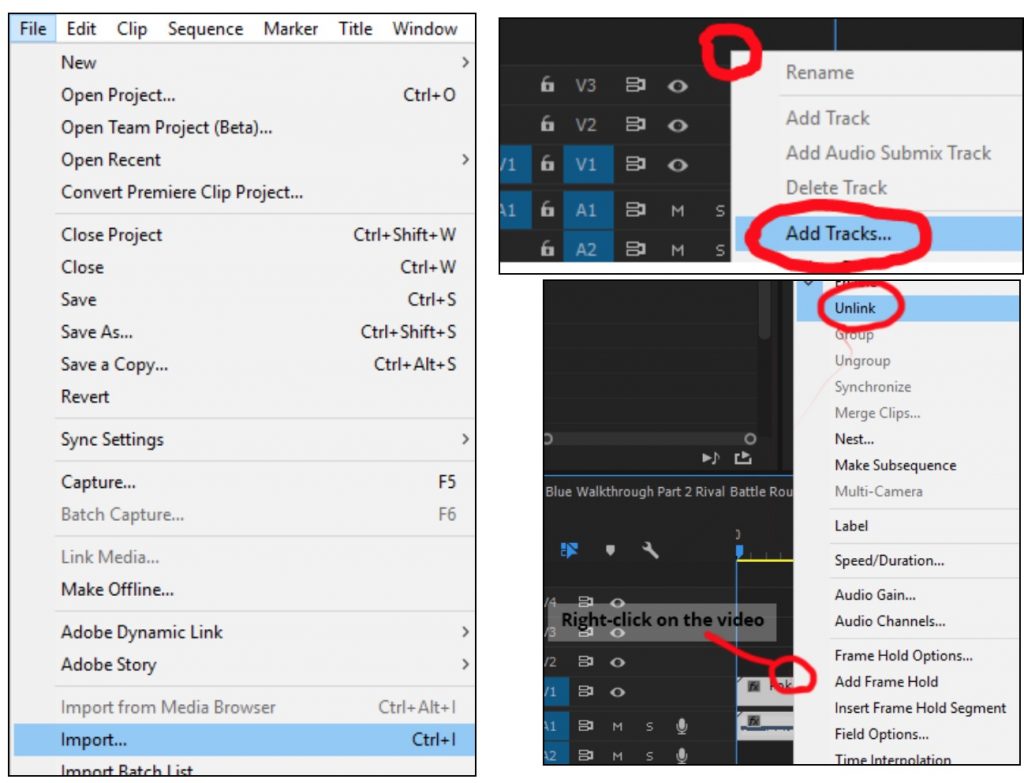
- Import your 8-bit footage and your VHS overlay into Premiere.
- Drag your 8-bit footage onto your timeline.
- Make sure you have 4 tracks by right-clicking on the blank space above your tracks and clicking "Add Tracks…"
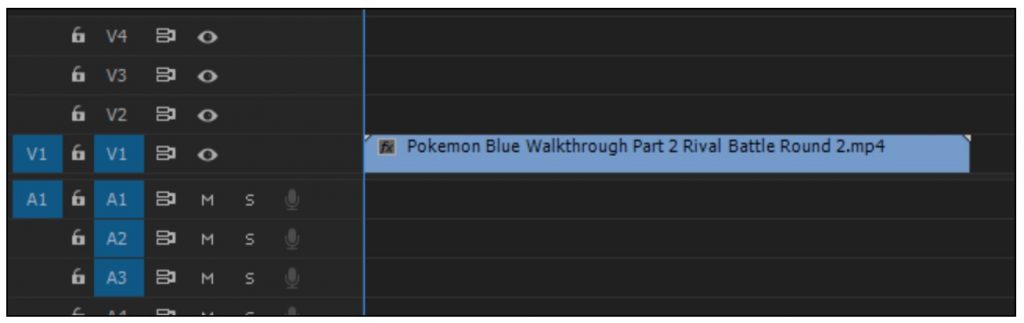
- Unlink your audio from your 8-bit footage by right-clicking on it in the timeline and selecting "Unlink"
- Click on your audio clip in your timeline and press delete to get rid of it.
Your timeline should look like this:
Now we're going to do a colour glitch effect.
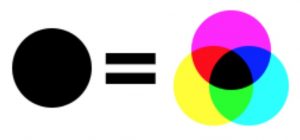
Explanation: Every image on your computer is made by combining red, green, and blue in various amounts. We are going to separate the red, green, and blue channels of our gameplay footage.
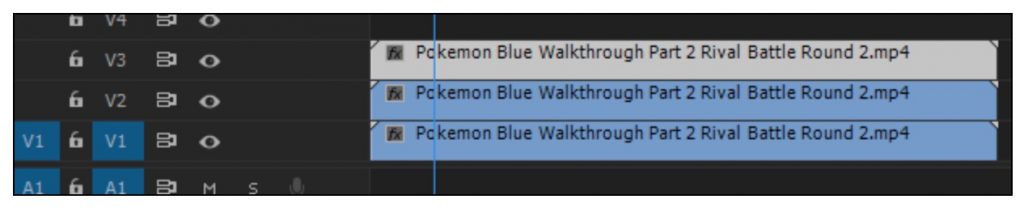
Hold alt and click + drag the video up onto the V2 track. When you alt+click+drag, you're duplicating your video track. Duplicate the track once more onto V3.
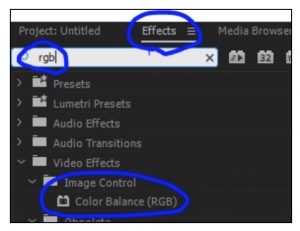
Click on the effects tab. Search for "rgb". Select "Color Balance (RGB)". Drag "Color Balance (RGB)" onto each one of your 3 tracks.
Since you've dragged the effect onto your video clips, you will now have a "Color Balance (RGB)" option in your Effect Controls window (top-left window of Premiere).
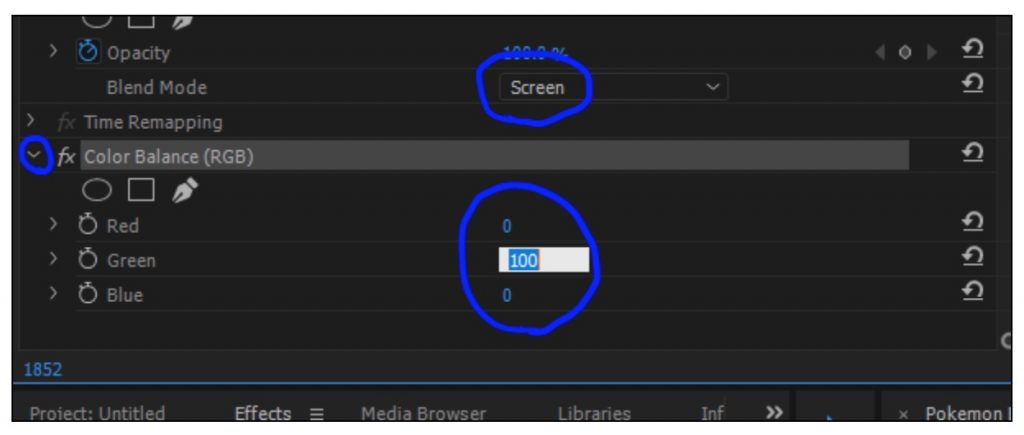
Click the video on your V3 track to select it and, in your Effect Control window, click the arrow to the left of "Color Balance (RGB)" to expand its options.
You'll see a "Red", "Green", and "Blue" option. The idea here is that you want V3 to be only the red channel, V2 to be only the green channel, and V1 to be only the blue channel.
That means, for V3, click the number to the right of the 'Red' channel, type in '100', then type in '0' for the 'Green' and 'Blue' channels.
Finally, set the 'Blend Mode' of each track to 'Screen'.
Your video layers are now set up, just go into the "Motion" tab of your Effect Control window and offset the 'x' and 'y' of each layer until you get a separation that you're happy with.
You can change the 'x' and 'y' easily by clicking and dragging left and right on the values in your Effect Control window.

Step 3: Adding VHS Tracking
At this point, adding the VHS tracking video should be a breeze. Drag your "VHS Bad Tracking Overlay" from your Media Browser panel onto V4 so that it's above all your other clips.
Right click on the clip and 'unlink' it from its audio, then click on its audio track and press 'delete' on your keyboard to get rid of its audio.
Select your VHS clip on V4 and, in its Effect Control window, set its Blending Mode to 'Screen'. Setting its blending mode to screen will get rid of the black in the video and make it look like your footage underneath is genuinely glitching on an old VHS tape.
If your VHS tracking clip is too short, you can copy and paste it within the Timeline to extend it.
But be careful: Premiere will paste into whatever track is highlighted blue, so make sure V3, V2, and V1 are deselected, then select V4.
Now that the V4 track is highlighted, select the VHS clip, ctrl+C, press 'down' on your arrow keys until your timeline marker is at the end of your VHS clip (pressing 'up' will send the marker back to the start of the previous clip), then press ctrl+V to paste it.
At this point, you'll want to import any audio you want in your video and drag it onto one of your empty audio layers (A1, A2, A3, or A4).
Part 4: Export as MP4
Go to File -> Export -> Media…
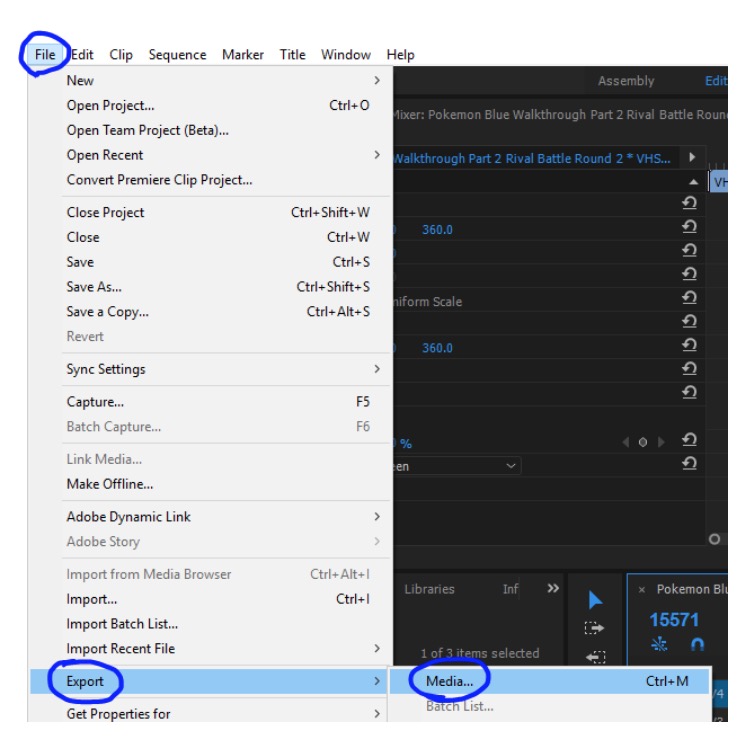
Your export window will open.
Change your 'format' to 'H.264'. This will compress your video and let you save as an mp4 video file.
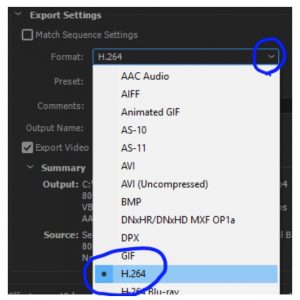
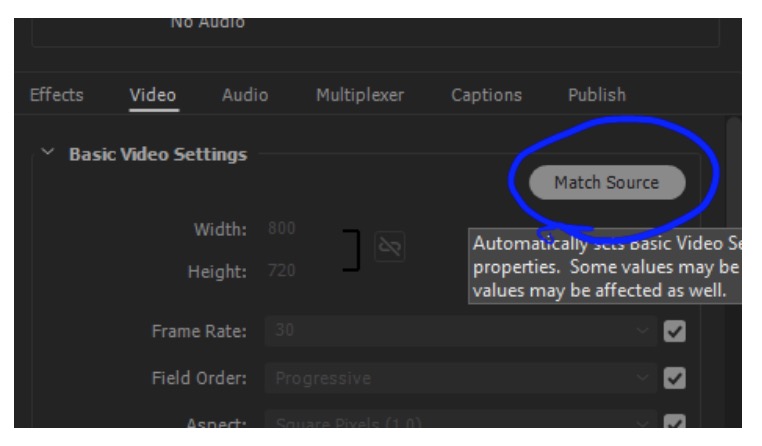
You can leave most of these settings to default. Hit "Match Source" just to make sure.
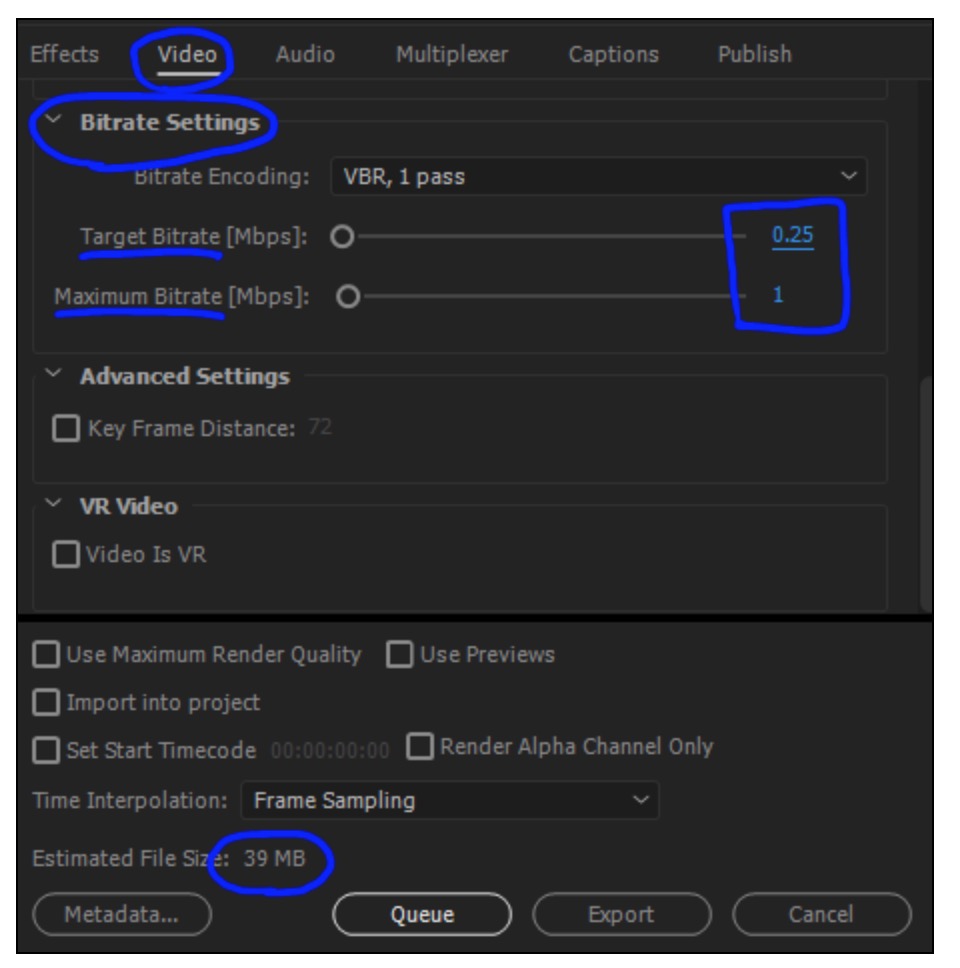
At the bottom of this window you may notice your 'Estimated File Size'. If your estimated file size is too large, you can go into 'Bitrate Settings' in your 'Video' tab and reduce the 'Target Bitrate' until your Estimated File Size is something more manageable for you.
You may want to reduce the 'Maximum Bitrate' along with it. Keep in mind, reducing the video bitrate also reduces the overall quality of your video.
Once you're happy with the Estimated File Size, click Export and Premiere will start rendering your video out to a file you can upload to Youtube.
Part 5: aesthetic Text
If you want vaporwave-style characters in your Youtube title, go to https://lingojam.com/VaporwaveTextGenerator, type in your title, and convert it to full-width characters. Then just copy + paste them into your Youtube title.
You're all done! Hit play, sit back, and remember a time long gone.


About Jay Sandwich
Jay Sandwich is a guitarist and modular synthesizer enthusiast whose musical life has taken him from shredding electric guitar to deep-diving the world of modular synthesis and experimental sound design. He brings a player perspective to music gear coverage — practical, opinionated, and grounded in years of actual playing experience across different setups and styles. At YouTubeMusicSucks, he covers guitar gear, rig rundowns, and musician interviews with the candid perspective of someone who has spent serious time on both sides of the instrument.
Check for FREE Gifts. Or latest free acoustic guitars from our shop.
Remove Ad block to reveal all the rewards. Once done, hit a button below